
Essential Tools for Candle Making: The Complete Beginner Checklist
Walk into candle making expecting a huge shopping list, and you might quit before you start. The truth is kinder: the essential tools for candle making fit on a short checklist, and half of them may already be in your kitchen. Here is what you actually need on day one, what can wait, and where to save money, so you can start pouring without a big upfront spend.
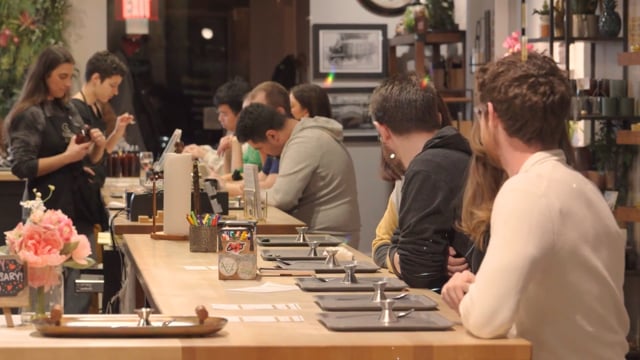
Watch the 90-second experience

Key Takeaways
- You need about ten core tools, and several have kitchen stand-ins.
- A digital scale and a thermometer are the true non-negotiables.
- Weight beats volume, and temperature control drives scent throw.
- Heat-safe containers and a tidy work surface prevent most messes.
- Skip the fancy extras until you have poured a few candles.
The 10 Tools You Actually Need (At a Glance)
Here is the whole core kit in one glance. Do not let the length scare you, since several of these have kitchen stand-ins and a few cost almost nothing.
- Digital scale
- Double boiler or wax melter
- Pouring pitcher
- Thermometer
- Stirring tool
- Wicks
- Wick stickers or glue dots
- Wick centering device
- Heat-safe containers
- Wick trimmer

Digital Scale: The Non-Negotiable
If you buy only one tool, make it a digital scale. Wax and fragrance oil vary in density, so measuring by volume is unreliable and quietly ruins batches. Weighing both your wax and your oil is the difference between a candle that throws beautifully and one that barely smells. A basic kitchen scale that reads in grams is plenty to start, though one that reads to a tenth of a gram helps, since small fragrance amounts add up quickly. It is the one tool almost no maker regrets buying.

Melting Setup: Double Boiler, Pitcher, or Wax Melter
You have three common ways to melt wax, from free to fancy. Any of them work, and the choice is really about control and how often you plan to pour.
| Setup | Cost | Best for |
|---|---|---|
| DIY double boiler | Free to low | Beginners using what they already have |
| Pouring pitcher in a pot | Low | A cleaner pour with easy control |
| Electric wax melter | Higher | Frequent makers who want set-and-forget |
Whatever you use, never melt wax directly on a burner, since it can scorch or even catch fire. Slow, gentle heat also protects the wax, which pays off in a smoother, better-smelling candle.

Thermometer: Your Temperature Control Center
A thermometer turns guesswork into a repeatable recipe. Hitting the right temperature to add fragrance protects delicate notes, and pouring in the right range gives you smooth tops. A simple glass or candy thermometer works fine, and an infrared one is a nice upgrade for quick surface reads. Either way, do not pour by feel. Clip the thermometer to the side of your pitcher so you can watch the temperature fall toward your pour range without stirring the whole time.

Wick Gear: Wicks, Stickers, and Centering Tools
Wicks are small but mighty. Get these three pieces right and half of your burn problems disappear before they start, because the wick controls how the candle actually burns.
- Wicks: cotton wicks are the reliable all-rounder, while wood wicks add a crackle and a different look. Size them to your container diameter.
- Stickers or glue dots: to anchor the wick to the bottom so it stays put during the pour.
- Centering tool: a wick bar, or the humble clothespin, to hold the wick straight while the wax sets.

Cotton Wicks vs. Wood Wicks: A Quick Note
The wick you choose changes both the burn and the vibe. Cotton wicks are the dependable starting point: easy to size, steady to burn, and forgiving for beginners. It is what we use at Urban Wick for a clean, even burn.
Wood wicks bring a gentle crackle and a modern look, but they can be fussier to light and to size. If you want a calm first project, start with cotton and experiment with wood once you are comfortable. Neither is wrong; they are just different moods.

Containers and Work-Surface Protection
Two safety-and-sanity essentials round out the core kit.
- Heat-safe vessels only: glass, tin, or ceramic rated for candles. Never plastic or unknown jars, which can crack or melt.
- Surface protection: a silicone mat or parchment paper turns spills into a wipe, not a scrub.
Not sure a vessel is safe? Our FAQs explain why we only use containers rated for heat.

Setting Up Your Workspace
Good tools work best on a good surface. Before you melt anything, clear a flat, heat-tolerant area near an outlet and away from clutter. Lay down your silicone mat or parchment, set your containers and wicks within reach, and keep a roll of paper towels handy for the inevitable drip.
Work in order: prep your containers and wicks first, weigh your wax, then melt. Having everything staged before the wax is liquid keeps you calm during the time-sensitive parts, like adding fragrance and pouring. A tidy setup is quietly one of the most useful tools you own, and it costs nothing but a few minutes of prep.

Nice-to-Haves That Can Wait
These are genuinely useful later, but skipping them on day one keeps you from overbuying, which is a classic beginner trap.
- A heat gun for smoothing tops.
- An upgraded wick trimmer or a wick dipper.
- Molds for pillars and shaped candles.
- Dyes, once you are comfortable with the basics.

Kitchen Substitutes: A Budget Starter Setup
You can start for almost nothing by borrowing from the kitchen. Here is a bare-bones setup and what each item can replace.
| Real tool | Kitchen stand-in |
|---|---|
| Melting vessel | A heat-safe measuring cup in a pot of water |
| Stirring tool | A wooden chopstick or skewer |
| Wick bar | A pencil or two chopsticks across the rim |
| Wick centering | A clothespin |
| Pouring pitcher | The measuring cup itself |
A bare-bones kit like this can cost very little, which makes a first pour easy to try before you decide to invest in nicer gear. At the bar, our Scent Designers bring all of this for you, so you can skip the setup entirely.

A Realistic Starter Budget
You do not need to spend a lot to make a great first candle. Here is roughly where the money goes if you buy the core kit new, and where you can trim by borrowing from the kitchen.
| Item | Priority | Where to save |
|---|---|---|
| Digital scale | Essential | A basic kitchen scale is fine |
| Wax and wicks | Essential | Buy small quantities to start |
| Fragrance oil | Essential | One or two scents is plenty |
| Thermometer | Essential | A candy thermometer works |
| Melting setup | Essential | Use a measuring cup in a pot |
| Heat gun, molds, dyes | Later | Skip these entirely on day one |

Safety Extras Worth Having
A few safety basics belong in every setup, no matter how minimal it is.
- A fire extinguisher or a pot lid within easy reach.
- Good ventilation while you melt and pour, since fragrance oils and warm wax are strong up close.
- Never leave heating wax unattended, not even for a minute.
Our proper candle care guide carries these habits through to safely burning your finished candle at home.
Ready to put these tools to work? Our companion guide on making soy wax candles walks through the whole pour. Prefer to skip the shopping list entirely? Everything is provided at the candle bar experience.
That includes the wax, wicks, tools, and 80+ premium fragrance oils, all set up and ready for you.
FROM OUR COMMUNITY
See how our guests are styling their Urban Wick candles at home.


#ScentYourSpace to be featured · Follow us on @urbanwickcandlebar
Frequently Asked Questions
Below is a list of commonly asked questions about Urban Wick Candle Bar. If you do not see what you are looking for just shoot us an email at info@urbanwickcandlebar.com or give us a call at (248) 977-8432. We’re here for you!
A bare-bones kit using kitchen stand-ins can cost very little, often just the price of wax, wicks, and a fragrance oil. A dedicated beginner setup with a scale, thermometer, pitcher, and melter costs more but lasts for years. Start cheap to see if you love it, then upgrade the pieces you use most.
They can be. A good kit bundles compatible wax, wicks, and fragrance so you skip the guesswork of matching parts. The trade-off is less control and sometimes lower-quality materials. Kits are a fine first step, and once you know your preferences, buying components separately gives better results.
Not in any harmful way. Stainless steel spoons, pitchers, and thermometers are common and safe for wax. Just keep a dedicated set for candle making, since fragrance oils are stubborn to wash out, and avoid using the same tools for food once oils are involved.
Or skip the shopping list altogether. Everything is provided at the bar, from the wax to the wicks to the scent wall. Make a reservation, or call us at (248) 977-8432 to plan your visit.
Want to Create Your Own?
Visit our candle bar in Downtown Birmingham and pour a custom scent that's all yours.
Or call us: (248) 977-8432
Jan–May: Thu–Sat 11am–8pm · Sun 11am–3pm
Jun-Aug: Thu–Fri 1pm–7pm · Sat 11am–7pm · Sun 11am–3pm
Related Blogs
-

12 Candle-Making Mistakes Beginners Always Make (and Easy Fixes)
Every candle maker has a graveyard of early failures, and that is completely normal. Most candle-making mistakes are common, predictable, and easy to fix once you know what went wrong....
12 Candle-Making Mistakes Beginners Always Make (and Easy Fixes)
Read MoreEvery candle maker has a graveyard of early failures, and that is completely normal. Most candle-making mistakes are common, predictable, and easy to fix once you know what went wrong....
-

Advanced Scent Blending Techniques for Candle Making (Beyond the Basics)
If you already know your top, middle, and base notes, these advanced scent blending techniques are where candle making gets genuinely fun. This is the level past 'that smells nice.'...
Advanced Scent Blending Techniques for Candle Making (Beyond the Basics)
Read MoreIf you already know your top, middle, and base notes, these advanced scent blending techniques are where candle making gets genuinely fun. This is the level past 'that smells nice.'...
-

What to Wear to a Candle-Making Class (So You're Comfy, Cute, and Wax-Safe)
Wondering what to wear to a candle-making class before your date night, girls' night, or bachelorette outing? Good news: there is no dress code, and you do not need a...
What to Wear to a Candle-Making Class (So You're Comfy, Cute, and Wax-Safe)
Read MoreWondering what to wear to a candle-making class before your date night, girls' night, or bachelorette outing? Good news: there is no dress code, and you do not need a...


